

Google Tag Manager and RedTrack
Our tech team has prepared a step-by-step guide on how to integrate Google Tag Manager (GTM) with RedTrack, you can find it below. Since it is an advanced tutorial, it is not covered by the RedTrack Support. Knowledge of web design languages such as HTML, CSS, JavaScript may be required. We suggest hiring an expert if you are not comfortable proceeding with this guide on your own.
Integration
GTM setup
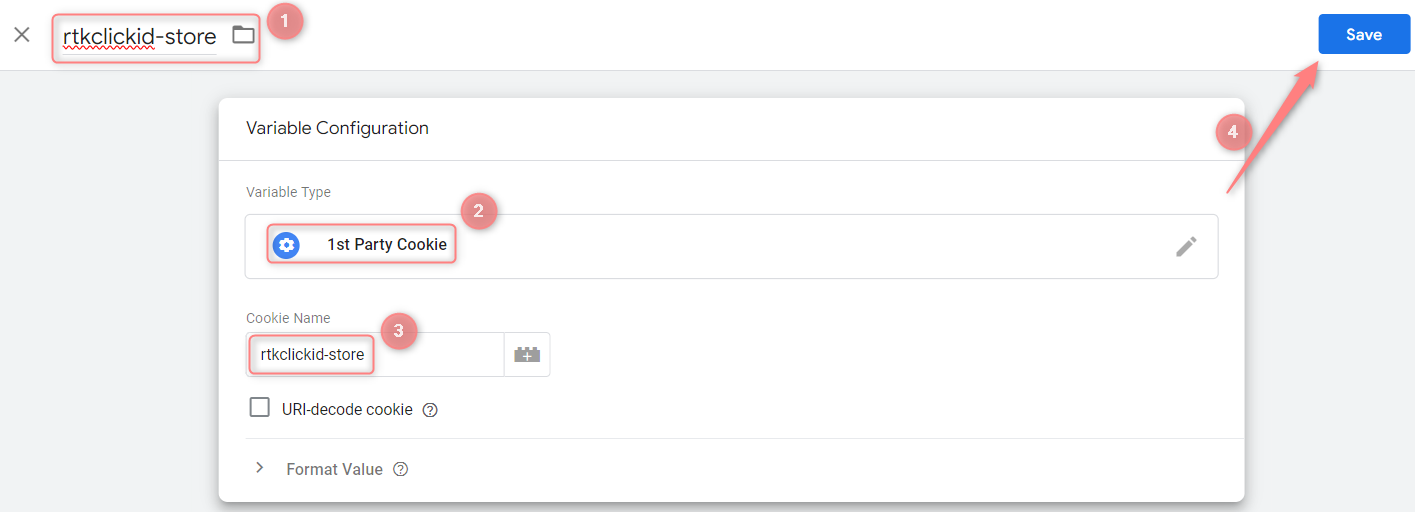
1. Create a variable to get clickid from the cookie. Variables→ New→ 1st Party Cookie:
Variable Name: rtkclickid-store
Variable Type: 1st Party Cookie
Cookie Name: rtkclickid-store
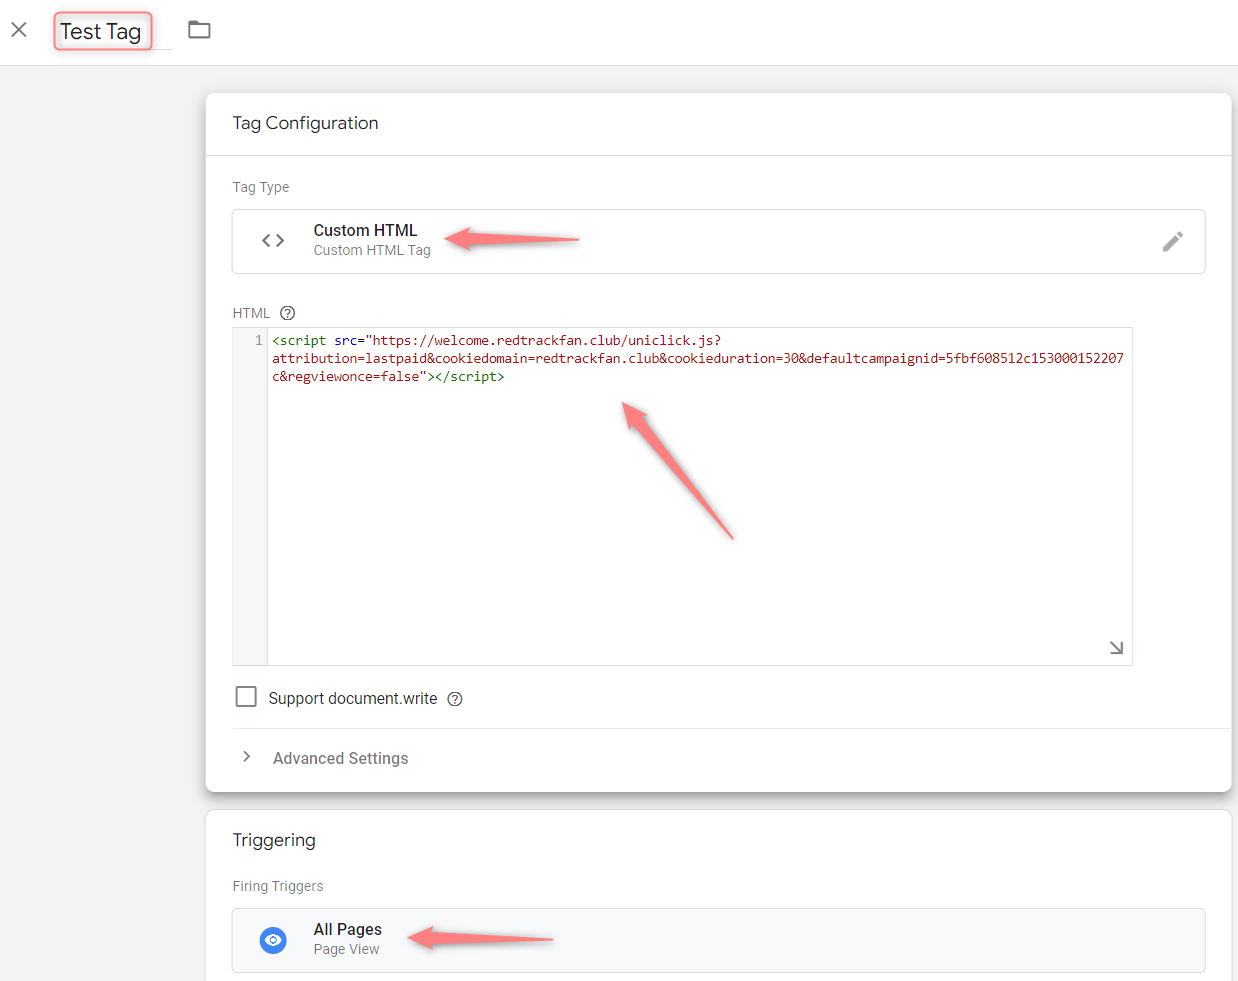
2. Create a Tag:
2.1 Go to Tags→ New:

2.2 Add the essential elements:
Name: any convenient name (use the one that is easy to identify)
Type: Custom HTML
HTML: Place the Universal tracking script you are going to use
Trigger: choose where you want the script to fire (in our example, it is All Pages)
Website setup
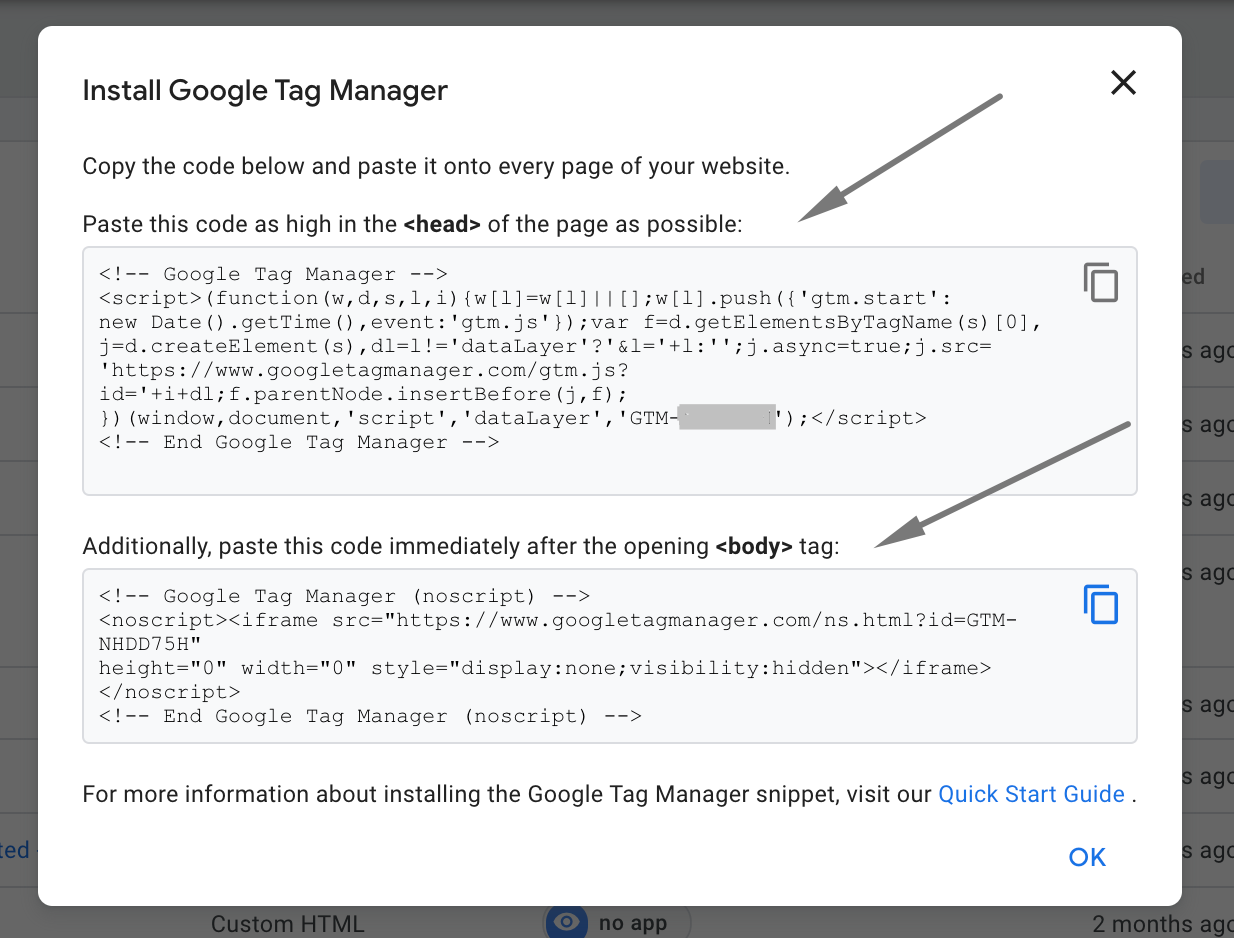
Add the GTM code to your website (landing page). To do that:
1. Press the Tag id here:

2. Add the GTM codes to the page header and body as is stated in the window:
RedTrack setup
It will depend on your flow and can be either a simple no-redirect flow with a landing page and affiliate offer or a complex website with various triggers.
Both GTM and RedTrack functionality allow you to play with the settings, but here are the basic things you will need to set up in RedTrack:
1. Add the Campaign, which is the fundamental element in RedTrack. The whole tracking is linked to the campaign. You will most likely be using a custom way of tracking conversion and sending a postback so you can skip the postback setup.
2. Add a custom tracking domain. This is a must nowadays as all service domains are more likely to be treated as malware.
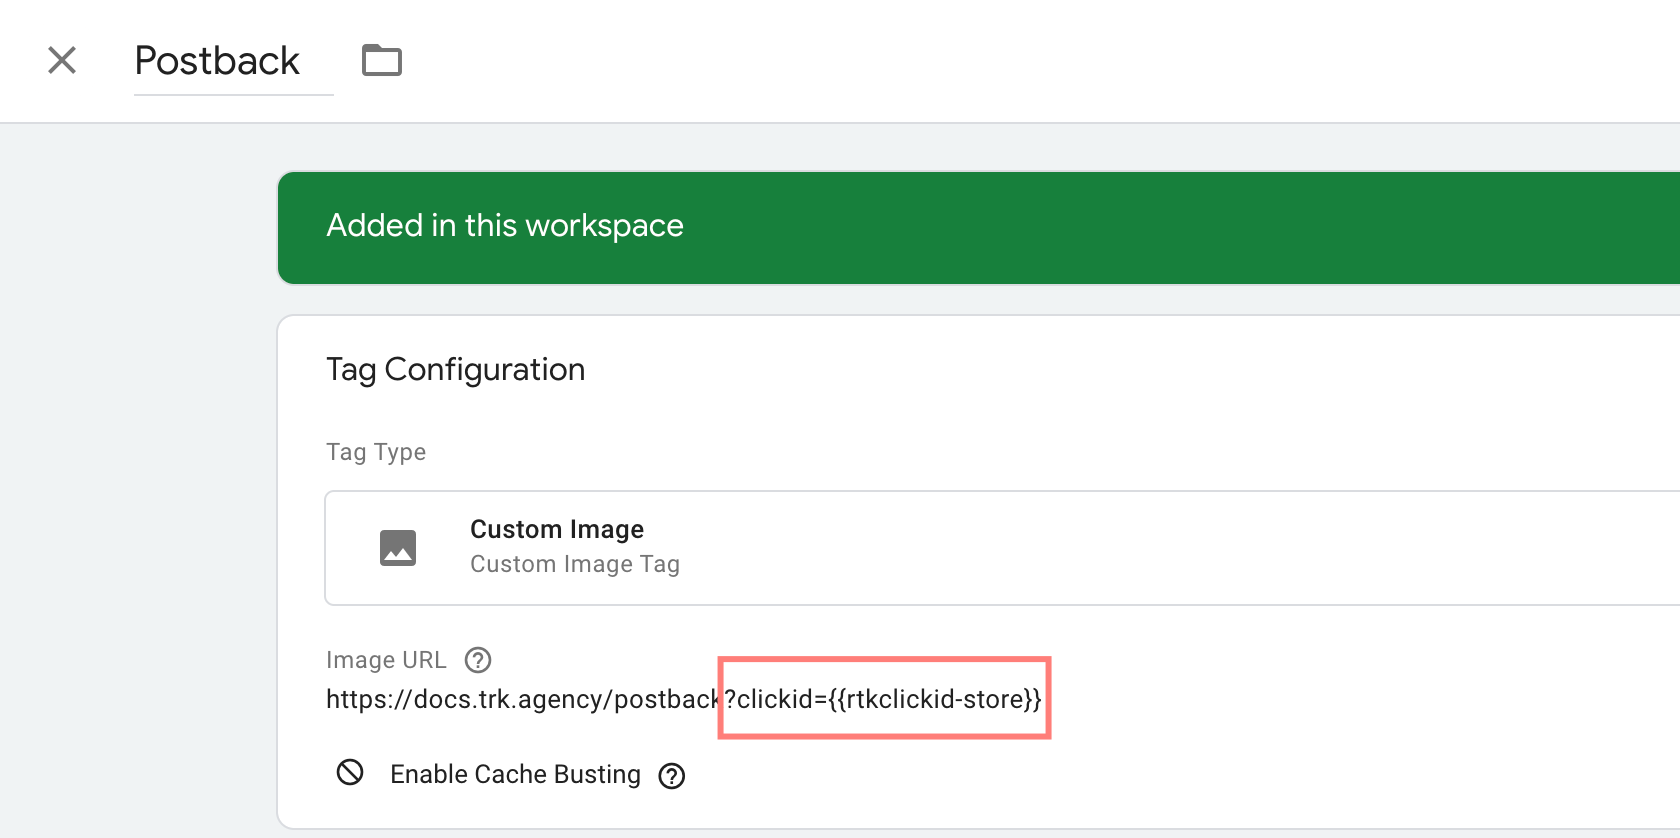
3. Adjust the postback trigger. This trigger can be used to fire the postback URL:
Create GTM Tag that sends S2S URL with clickid attached with the following options:
Tag Type: Custom Image
Image Url: your actual S2S url with parameter clickid={{rtkclickid-store}} added
Triggering: the page where you want the postback to be fired, or the click on the button
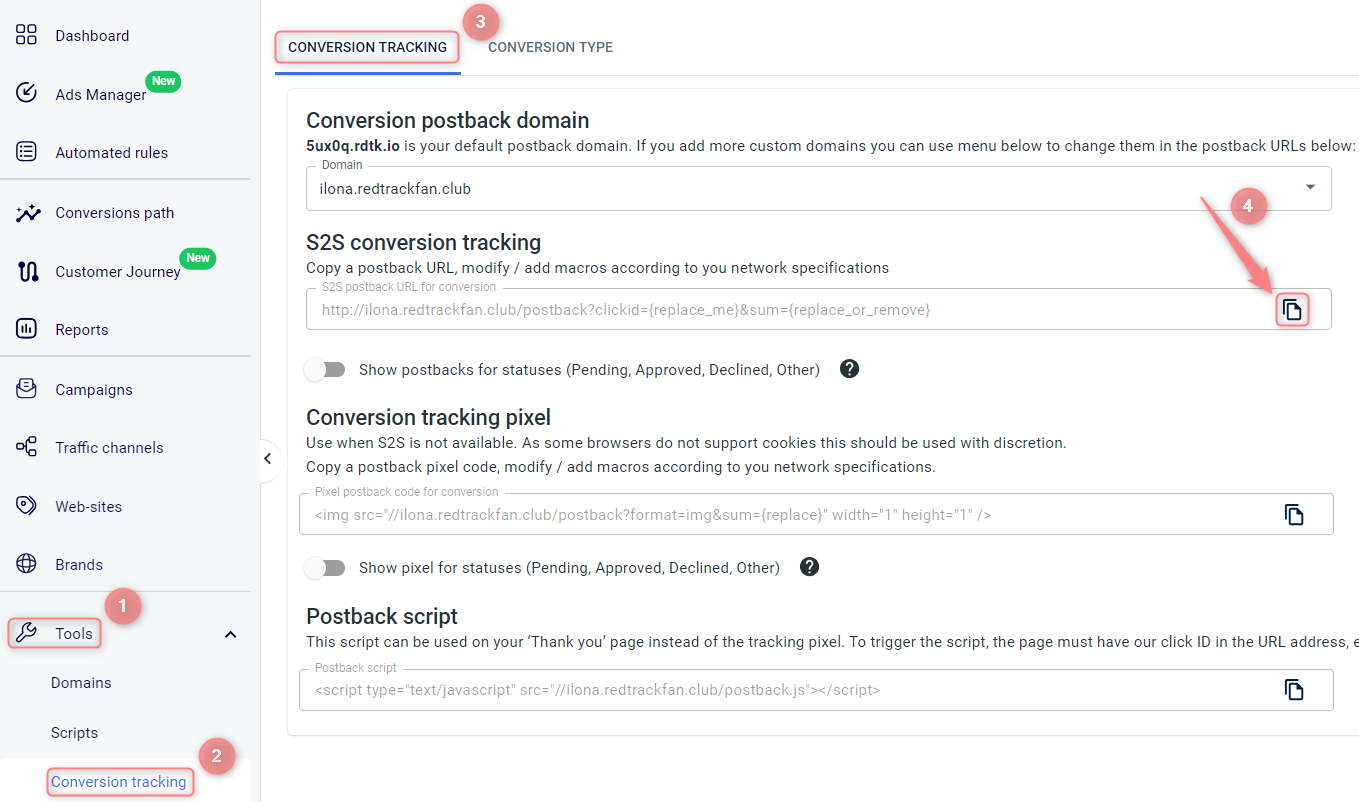
Your RedTrack S2S postback URL template can be found under Tools→Conversion tracking:
☛ There can also be different event-triggering settings – it all depends on your current flow (the elements are created the same way we have described above).
☛ GTM allows you to play with your settings in different ways. Having GTM integrated with RedTrack, you are ready to explore more. Here is more information on the functionality.