Facebook and RedTrack

What’s Facebook/Instagram?
Both Facebook and Instagram have the same ad managing interface (Facebook Ads Manager), so this article describes the flow for both platforms.
There are limited cases when Facebook allows you to use the redirect link (e.g. RedTrack campaign tracking URL) but we as a service provider do not recommend it and cannot guarantee safety.
Traffic filtering functionality is limited for Facebook and can be used for the Offer level only (for the cases when you run the traffic to the landing page first). For more details go to the Traffic filtering guide.
Facebook integration allows you to:
- pass all the conversion data back to Facebook (even the extra conversions), attach it to the campaigns (not only to the events manager), and help Facebook to optimize your traffic for even better traffic matching;
- pause non-converting creatives and campaigns directly on the Facebook side, no manual work;
- auto update your cost data.
Integration
Important before you start
Before you proceed with the main integration steps make sure to have the already added:
- Custom tracking domain (a CNAME record). The root domain you will need later for Facebook.
- Offer & Offer source (if you are an affiliate) / Brand & Website (if you are an advertiser).
RedTrack side
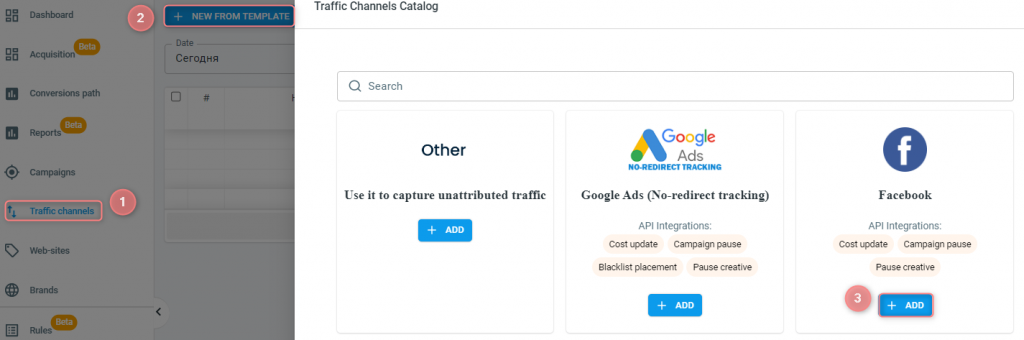
1. Add a Facebook template and integrate it with RedTrack.
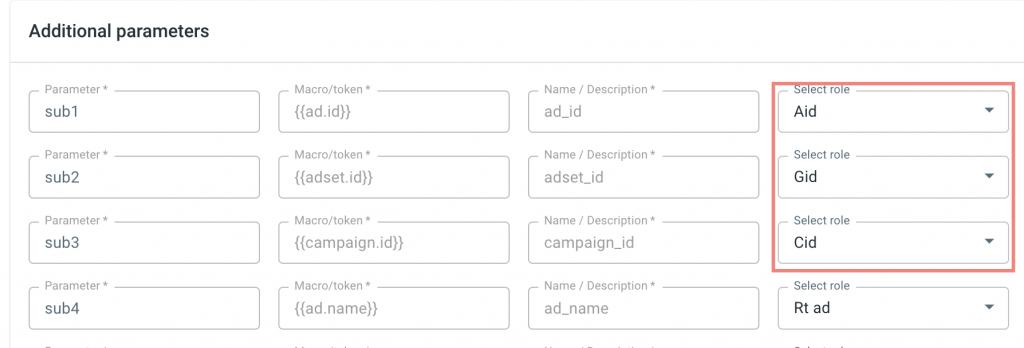
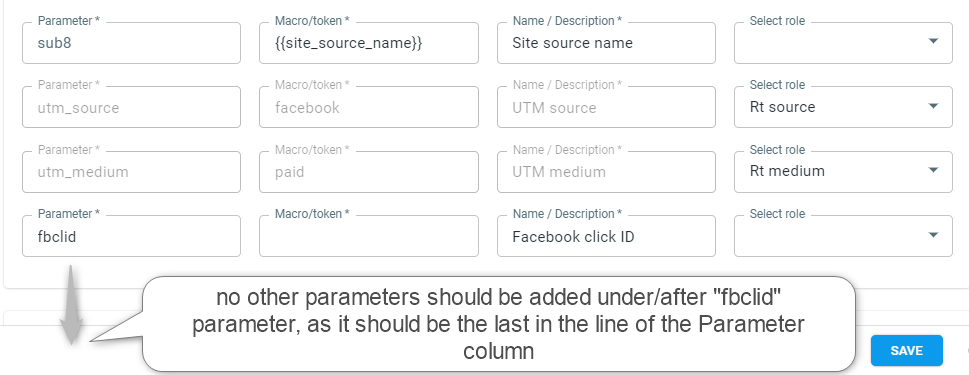
- Go to Traffic Channels → New from template → Facebook → Add:
The following are essential for the API cost integration:
{{ad.id}} should always be with Aid role
{{adset.id}} should always be with Gid role
{{campaign.id}} should always be with Cid role
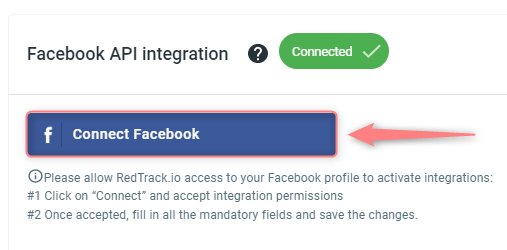
- Save the template → Connect Facebook → verify your ad account:
Since it is a complex API integration, we need to get permission to integrate from Facebook first. Once you integrate RedTrack with Facebook, the green mark “Connected” will appear:
Sometimes Facebook can disconnect your account randomly due to some security reasons (you will notice that almost immediately since the cost data stops coming at that point). All you need to do in that case is to reconnect.
2. Create a campaign in RedTrack.
1. Create a campaign in RedTrack using this guide. Once the campaign is created, all the tracking links and the parameters for the script will be generated automatically and include all the supported macros.
2. For Facebook tracking you will need to use the tracking script. Follow this guide to choose the one that suits your needs better and set it up.
Since Facebook does not like redirect tracking, you will have to use our script on the page code.
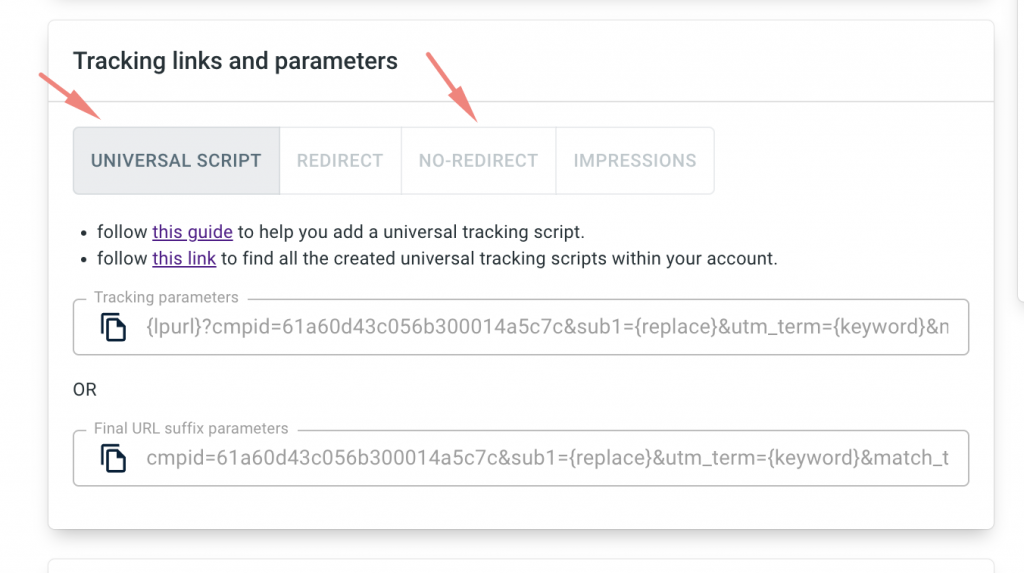
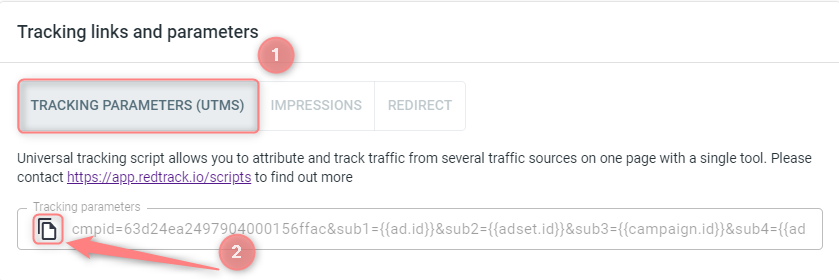
The tracking parameters you will need later to add on the Facebook side. You will need the “universal script” or “no-redirect” tracking parameters later depending on the type of script you have chosen before. Copy and save them.
3. Enable Auto-update costs toggle to receive costs automatically:

1. Create a campaign in RedTrack using this guide. Once the campaign is created, all the tracking links and the parameters for the script will be generated automatically and include all the supported macros.
2. For Facebook you will need to use our universal tracking script (created automatically once you’ve added the Website) on the page code or for your e-commerce store. Check out these guides for details.
The tracking parameters are to be copied and saved for later.
3. Enable Auto-update costs toggle to receive costs automatically:
3. Set the conversion events for Facebook.
Use this guide to help you add the events you plan to use. It will automatically send your conversion types to Facebook exactly as you name them.
We recommend keeping a Purchase name for one of your conversions so that you do not need to make any adjustments on the Facebook side since Facebook knows this name very well and will optimize the traffic better for a Purchase than for a custom name (Sale, Conversion, etc.)
Facebook side
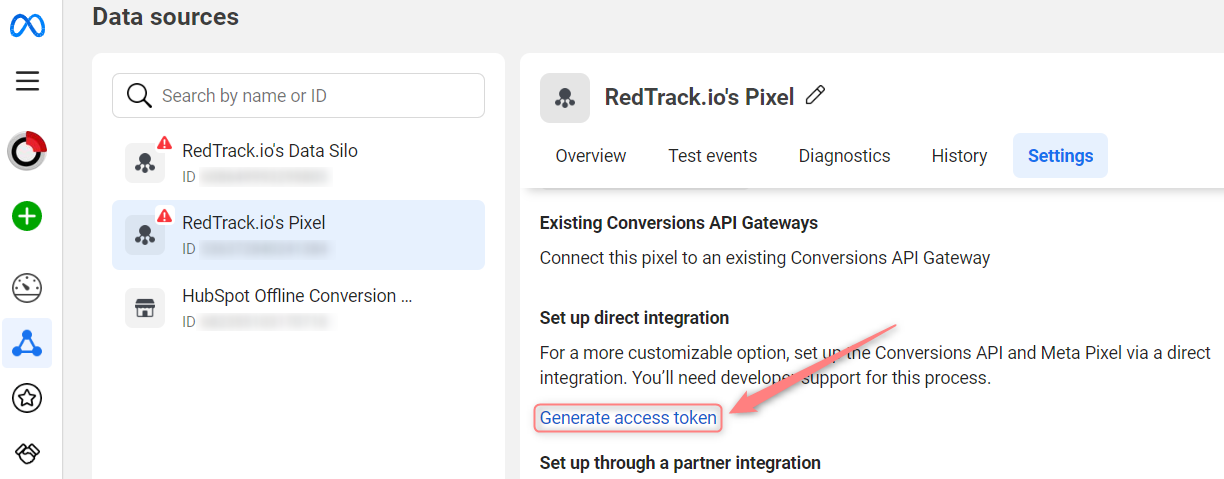
1. Generate the Conversion API Key.
Your Facebook account → Events Manager→ pixel settings → Settings → Create Access Token:
2. Verify your domain on the Facebook side.
3. Find and copy your FB pixel.
You can find your unique pixel ID in the Facebook campaign settings.
4. Add your pixel(s) to RedTrack.
There are 2 ways of adding your FB pixel to RedTrack:
- on the Offer/Website level, which is the preferred method and the most recommended by RedTrack;
Offer/Website → CAPI (Maximize signals) - on the Traffic channel level, which might be a bit limited and useful for certain types of Affiliates only;
Together with the Pixel ID add the Conversion API key for that pixel.
Action source: we recommend using the website option
Event URL: the domain verified for Facebook. Use the “https://domain.name” URL structure.
5. Create an ad on Facebook (if you haven’t done it already) or update the existing one with the tracking parameters.
Ads Manager → Create Ad → create a new campaign or use an existing campaign → set up campaign parameters → copypaste your LP URL/Website URL (the link without tracking parameters) under the website URL → add additional tracking parameters (universal script or tracking parameters (UTMs)) in the “URL parameters” section
If you need to be sure you receive the correct names, add them to the tracking parameters manually or analyze the data by IDs instead:
cmpid=5f92a30bc860ee0001fa9996&sub1={{ad.id}}&sub2={{adset.id}}&sub3={{campaign.id}}&sub4=myad&sub5=myadset&sub6=mycampaign&sub7={{placement}}&sub8={{site_source_name}}
6. (optional) Warm up your Facebook account with test conversions.
7. Set up the automation.
Check out the following articles for the automation features:
- Integrated Traffic channels (for a general overview of the automation features in RT)
- Auto rules
- Auto cost update